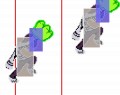
Subject 11 is a grappler who uses their psychokinetic powers to toss their enemies around like ragdolls. They have high-damage command grabs and can armor through opponents attacks. They gain meter by blocking opponents' attacks, and can use that meter to generate a shield.
Moveset[edit]
Normals[edit]
| Input
|
Move
|
Description
|
Frame Data
|
Hit/Block stun
|
Notes
|
|
|
 |
11 jabs |
|
12
|
|
|
|
 |
11 throws out a large psychic fist. |
|
KD / 14
|
Knockdown
|
|
|
 |
11 claws forward at the ground. |
|
16
|
Moves forward after active ends
|
|
|
 |
11 scoops the opponent upwards. |
|
KD / 13
|
Knockdown
|
|
|
 |
11 slashes out with a claw. |
|
14
|
|
|
|
 |
11 spreads out and does a body slam. |
|
20
|
|
| Input
|
Move
|
Description
|
Frame Data
|
Notes
|
|
|
Forward Throw |
Hits the opponent, then throws them forward. |
|
Can reset cornered opponent with Jab afterward.
|
|
|
Backward Throw |
Hits the opponent, then throws them backward. |
|
Can reset cornered opponent with Jab afterward.
|
Subject 11's dash is a low profile crawl. It's hitbox shrinks to match. The recovery frames do not occur until 11 exits crawl by inputting it again, or using a move.
| Input
|
Move
|
Description
|
Frame Data
|
Notes
|
|
|
 |
11 enters Crawl. |
|
Can be used to dodge higher attacks.
|
|
|
|
11 enters Crawl. |
|
Can be used to dodge higher attacks.
|
|
|
 |
11 exits Crawl. |
|
Instantly makes 11 vulnerable to higher attacks
|
Specials[edit]
| Input
|
Move
|
Description
|
Frame Data
|
Notes
|
|
|
 |
11 Dashes forward for a grab. |
|
2 Hits
|
|
|
 |
11 Slams the Opponent multiple times |
|
4 Hits
|
|
|
 |
Far reaching grab. |
|
2 Hits
|
|
|
 |
Anti-Air Grab. Does not hit grounded opponents. |
|
3 Hits
|
Rumble Meter[edit]
Subject 11's meter has 7 bars, which fill up every time an attack is blocked. Once full, 11 can press AB to create a shield that absorbs 1 damage.
| Input
|
Move
|
Description
|
Frame Data
|
Notes
|
|
|

|
11 surrounds himself with psychic energy
|
|
Super freezes on frame 0. Gives 1 hit of armor
|
Midscreen Combos[edit]
j.A or j.B > 2B > 1B
j.A or j.B > 2B > AB > 2B > 1B
2A (Late Hit) > 2B > 1B
j.A or j.B > 5A > 5A
Corner Combos[edit]
Throw > 5A
Notation
Strategy[edit]
Subject 11 is a grappler who wants to get close to the opponent in order to get them in damaging command throws that set up for more command throws.
Subject 11's 5B is the crux of their neutral being very long ranged and moderately fast, although does have significant end lag. Their 5B can be canceled into 3A to get close on a successful hit, making up for its lack of combo potential. 2A and 2B are Subject 11's fastest ranged punsihes, although they are slow, coming out on frames 8 and 9 respectively.
Anti-Airs:
1B is a very fast anti-air grab with a lot of invulnerability and range, making it great at catching most jumps that can threaten a jump normal. It does tend to struggle against cross-ups however. It does 3 damage by itself, making it very rewarding to land and a big deterrent for jumping
5B is slow but has a lot of range, and is very useful for catching far away jumps all the way out to mid-screen
2B can be used as an anti-air, although it doesn't have the best hitbox for it. In theory it has better reward by comboing into 1B, but those combos fall out even at mid range.
j.A and j.B aren't the fastest anti-airs, but they leave the opponent close to Subject 11 which is a big reward for them
All of Subject 11's special moves are command throws, and each has a different use in neutral, offense, and defense.
3A is a sliding grab most useful for throwing opponents anticipating a 5B, throwing opponents who blocked a normal and didn't use a jump or reversal after, and getting close to an opponent after a knockdown.
1A does the same 2 damage as 3A but has much less range. Since it doesn't move them forward however, it is much safer to use. The grab hitbox is external making it even safe against many reversals. It can be canceled into from blocked normals like 3A but trades range for safety.
1B does not hit grounded opponents and is the only special they can combo into. It is a great anti-air, although that is its only use.
3B has the least range of their specials but is instant, even grabbing opponents who are attacking Subject 11 while they are getting up. It does a massive 4 damage and can punish many moves that are meant to be safe, most namely Quinn's 3A.
While their normal throws are not specials and have more startup and even less range than 3B, they are much quicker to execute and allows Subject 11 to get close after even when used mid-screen, so in some cases there can be reason to use them over 3B.
Subject 11's crawl is a very unique movement option that can help supplement their approach, offense, and defense. Crawl goes under almost every move that is not a low which severely limits what the opponent can use to hit them. This is especially useful for dodging Parker's orb zap and Tenchi's fireball. Characters with long ranged lows like Hector and June have an easier time dealing with crawl. On defense crawl gets low instantly, which can go under moves the opponent puts out, allowing Subject 11 to quickly rise and punish. This is useful when fighting another Subject 11 as it dodges 5B, 3A, 1A, and 3B instantly, which can lead to scenarios such as one Subject 11 ducking another's command throw only to rise and command throw them right back.
Subject 11's meter rarely comes into play, it is more like a situational comeback mechanic as it needs 7 attacks to be blocked. This acts as a passive resistance to zoning, since Subject 11 doesn't mind staying out for a bit if they get to block some attacks. Once the meter is full Subject 11 can get a bubble with 1 armor. The opponent can cancel normals off the armor and throws destroy it. Blocking attacks also still removes the armor. Even so it is still incredibly useful to be able to armor an attack. Jumping with a bubble is strong, as most anti-airs are 1 hit so Subject 11 can sacrifice the armor for a free jumping normal.
Once Subject 11 gets in their primary goal is to land a command throw or punish the opponent for trying to escape them. This can be done with elaborate setups fine tuned for each specific moves knockdown timing or just eyeballed, whatever works. Command throws beat blocking and attacking. Attacking beats jumping and attacking. Blocking beats reversals. Cycling through their options and being unpredictable is necessary to keep the opponent in their grip. One of their main options for attacking is 2A, which moves them forward and is very plus on block, allowing more mix-ups afterwards. 2B is bad on block but allows Subject 11 to get close on hit and is good after 2A, since 2A > 2A can be jumped out of, but 2A > 2B cannot. 2B can also be canceled into 3A or 1A on block to surprise opponents.
On defense, Subject 11 has a few options that each cover different scenarios. 1B is fairly useless on defense, as even though it has a lot of invulnerability it cannot hit grounded opponents and is very laggy. 3B is useful if the opponent gets too close, and crawl is good for dodging higher attacks. This leaves a spaced low attack as a blind-spot for Subject 11, which is a thing to keep in mind. Quinn's wolf mode also cannot be grabbed, making dealing with it a very big challenge for Subject 11.
History[edit]
- 0.4.5.0:
- Meter: +2 total (no longer goes away with time)
- Shield: destroyed during first hit of throw
- 0.4.4.0:
- Increased height on crawl
- StandB: -1 active, +1 recovery, -4 blockstun
- DownForwardB: +4 recovery
- Reduced distance thrown after throw forward/back
- 0.4.3.0:
- Forward/backward throw: frame data and throw velocity has changed
- DownForwardA: startup +3
- Crawl: +1 startup, reduction in speed, increased width
- 0.4.2.0: DownBackB: No longer throw invulnerable indefinitely after move
- 0.4.0.0: Meter amount necessary for armor decreased to 5
- 0.3.8.0: No longer invisible when crawling
- 0.3.6.0:
- Meter added
- Super added
- DownForwardA is now downBackA
- New move on downForwardA
- Throw direction leniency window decreased
- Dash option added
- 0.3.5.2:
- DownBackB: Connected grabs have +18 frames to recovery
- LowB: +2 to recovery, now has standing hurtbox active frames onwards, bigger attackbox
- StandB: +12 to recovery, now knocksdown
- Regular throws push up increased
- 0.3.5.0: Made character playable for everyone


